Group-based OAuth in FileMaker using Google Workspace
A severe drawback in Google’s OAuth flow is the inability to add group claims to the Google OAuth access token. This currently renders the group-based FileMaker OAuth flow (as of version 2023) useless for teams that develop FileMaker solutions using Google OAuth via Google Workspace. Let’s dive in to see a proposed workaround using Microsoft Entra ID to federate identities provided by Google Workspace.
Table of Contents
- Prerequisites
- Setting up your organization
- Setting up a FileMaker Server
- Configuring access to a FileMaker App
Prerequisites
To get started, you will need:
- A free Microsoft Azure account
- A Google Workspace subscription with super-admin privileges
- A FileMaker Server with Admin Console access
Setting up your organization
Follow the steps below to get started with the authentication setup.
Federating users to Entra ID from Google Workspace
To start federating user identities to Microsoft Entra ID, you need to set up federation from Google Workspace. The following documentation from Microsoft keeps updated steps on how to do that.
Configure federation between Google Workspace and Microsoft Entra ID - Windows Education
After verifying, you should be able to have an Entra ID setup which mirrors your Google Workspace user directory.
Setting up a FileMaker Server
There are many OAuth options in FileMaker Server, but this guide focuses on setting up Microsoft OAuth as a custom OAuth provider, for the added benefit of customizing the label and icon of the OAuth provider.
Setting up custom Microsoft Entra ID OAuth provider
Registering a new application
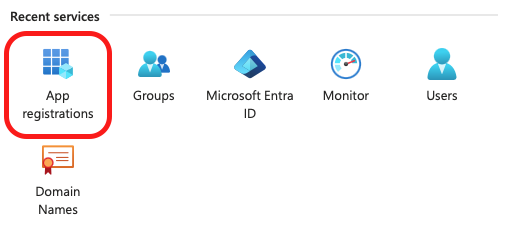
First you must create a new Entra ID app registration through the Azure Portal.
- Search for App Registrations:

- Click on New registration
- Add a descriptive name (e.g. “FileMaker Server”)
- In Supported Account Types choose what’s best for your case, we’re keeping it simple with:
- Accounts in this organizational directory only (Default Directory only - Single tenant)
- As a redirect URI, enter https://<your_domain>/oauth/redirect where <your_domain> is the hostname of the FileMaker Server instance.
Setting up an app registration key
You need to create a secret key by performing the following steps:
- Navigate inside your new app registration > Certificates & Secrets.
- Click on New client secret to create a new secret and save the generated key.
Seeting up relevant access token group claims
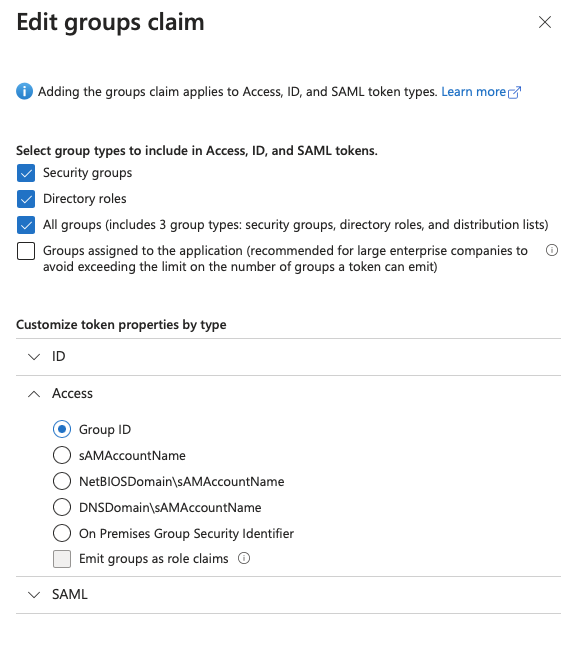
In order to be discovered by FileMaker’s OAuth flow, the access token should include the relevant group claims.
- Navigate inside your new app registration > Token configuration > Add groups claim
- Fill in as shown below:

Configuring the FileMaker Server
After making an app registration for the FileMaker Server instance, keep your Azure Portal tab open with your new app registration and, in a new tab, enter the Admin Console of your FileMaker Server:
- Navigate to Administration > External Authentication
- Under Custom IdP Authentication Settings, fill in the following fields:
- Custom IdP Name: The name as you want it to appear in the FileMaker OAuth screen for your users.
- Client ID: The Application ID that’s visible in the App Registration you just made on the previous step.
- Client Secret: The secret key you created in your app registration in step 3.1.2.
- Authorization Code Endpoint: https://login.microsoftonline.com/
/oauth2/v2.0/authorize, where is the Directory ID in the App Registration you just made on the previous step. - Authorization Token Endpoint: https://login.microsoftonline.com/
/oauth2/v2.0/token - Authorization Profile Endpoint: graph.microsoft.com/oidc/userinfo
- Custom IdP Icon Endpoint: Optional, an icon to show.
- Custom IdP User Account Schema: preferred_username
- Custom IdP User Group Schema: groups
- Scope: openid profile email
- Select OIDC as the flow option and click Save Authentication Settings
Configuring access to a FileMaker App
This is straightforward, after federation is setup between organisations, OAuth is setup in the FileMaker Server and relevant groups are created in your Microsoft Entra ID tenant.
Creating groups in Entra ID
In your Entra ID directory, any groups created will have an associated Group ID in their overview page.
Assigning Entra ID groups to FileMaker Apps
The Group ID of each Entra ID group can be used as the identifier inside a FileMaker app’s access management page (File > Manage > Security > Authenticate via Custom OAuth).
- Click on + New
- Select Group
- Add the Group ID of the group you created as the Group Name.
- Add the group name in the Description for posterity.
- Voila! You can now sign in using your Google Workspace credentials via your assigned Entra ID group.
Hopefully this guide helps you set up a group-based OAuth flow in FileMaker using the existing Google Workspace directory.